Request business data from your customers
Learn how to onboard and manage companies that represent your customers
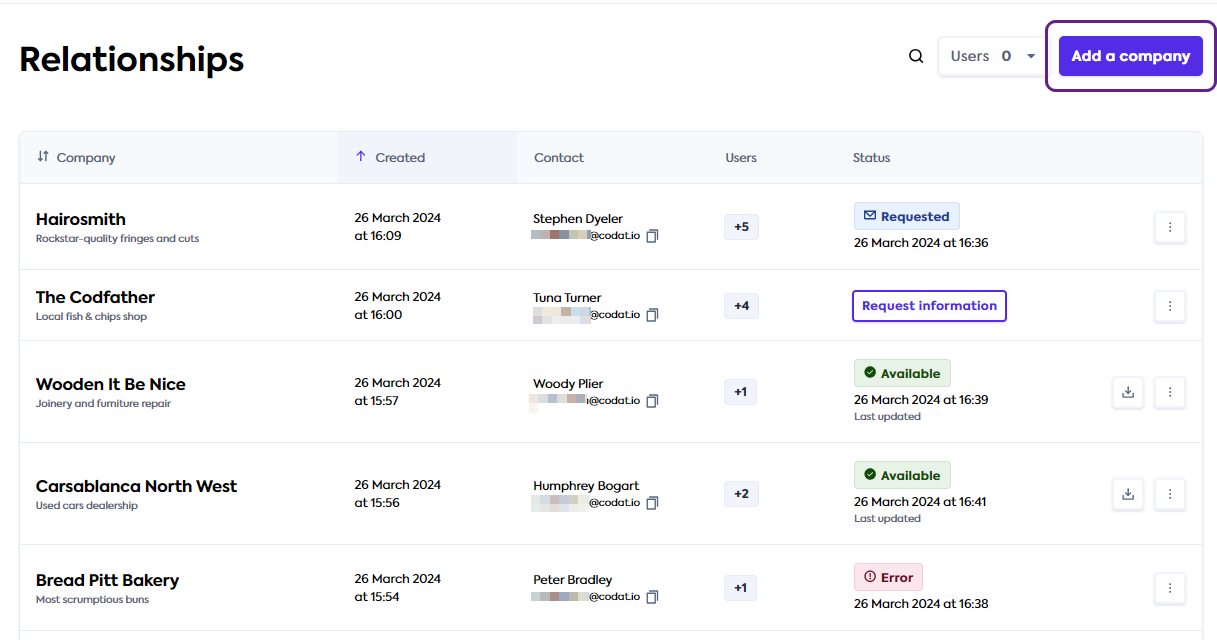
Our Relationship Portal is your one-stop shop to view the clients and relationships you are responsible for. Here, your organization's clients are represented as companies.
In this guide, we will cover the ways you can request financial data from your clients and create new companies and manage existing ones.
Request customer information
Add a new company
To create your client as a company in the Relationship Portal and start the onboarding process, click the Add a company button.
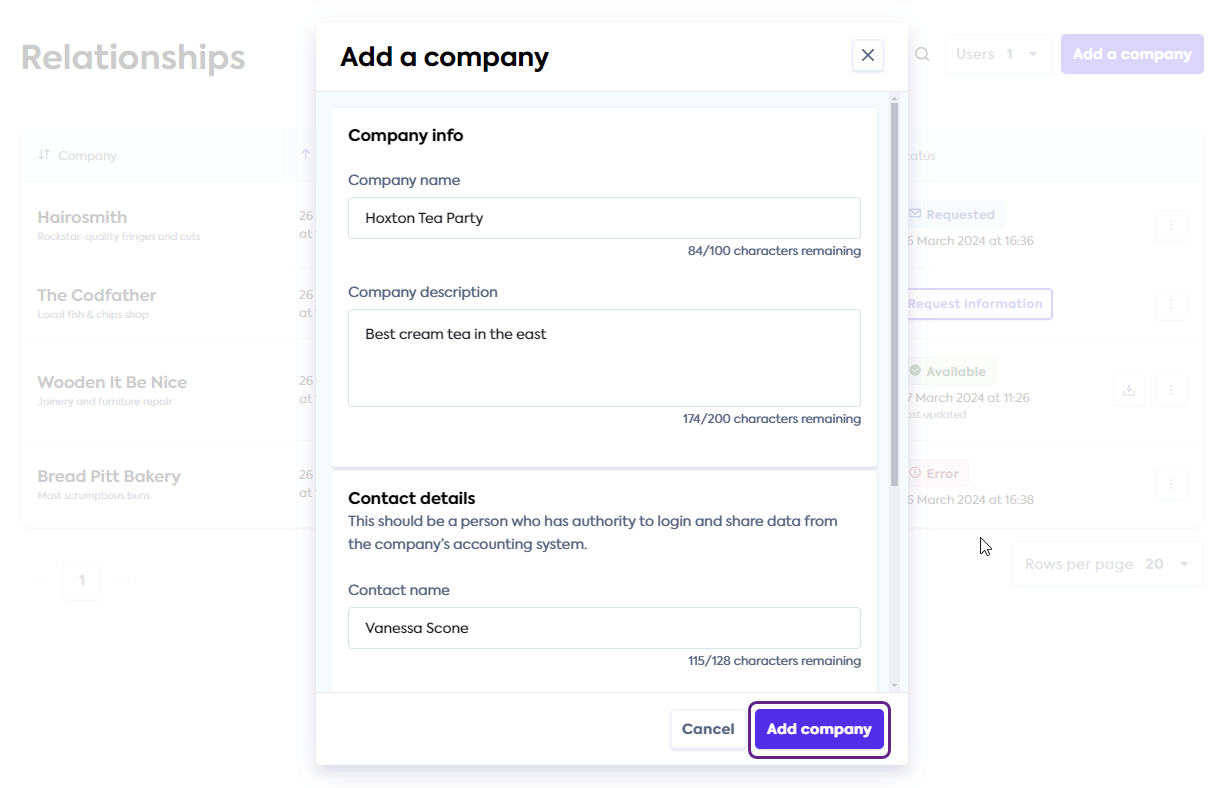
This will open the company creation window with the following sections:
- Company info: use it to add the company name and description.
- Contact details: use it to add the name and email of the company's point of contact.
- Users: use it to assign different analysts to be responsible for the company from a dropdown list.
Company name and contact name and emails are mandatory fields, but you don't have to assign an analyst to the record - for example, if the client has not yet been allocated to a manager.
When ready, click the Add company button. This creates a record in the Relationship Portal.
Request financial data
You can request supplier and spend data from your customer in two ways:
Once you request the information, your customer will need to go through a set of steps to allow you to see their business data in the Relationship Portal. You can learn more about this in the Customer journey guide.
Request financial data during company creation
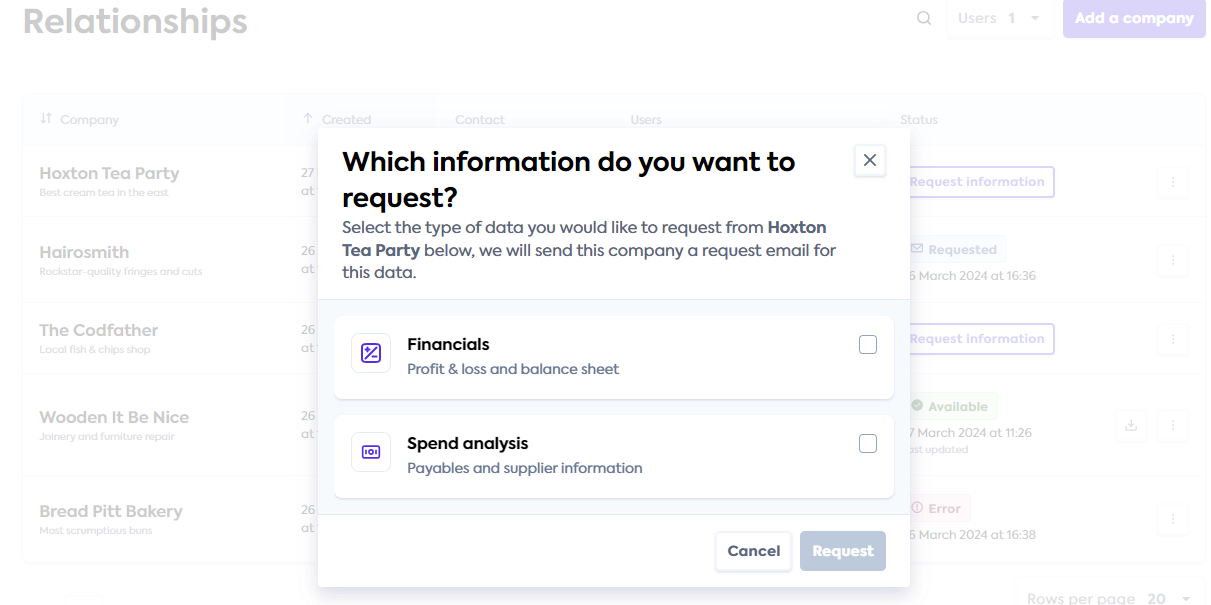
When you follow the company creation flow and click the Add company button after filling out the company details, you will see the information request window pop up. It is used to onboard your client and request access their financial data.
Select the Spend analysis tickbox to ask your client for accounts payable and supplier information to the level of individual transactions, payment methods, terms, etc. You can also choose to request Financials, which include a profit and loss statement and a balance sheet statement enriched with our categorization feature.
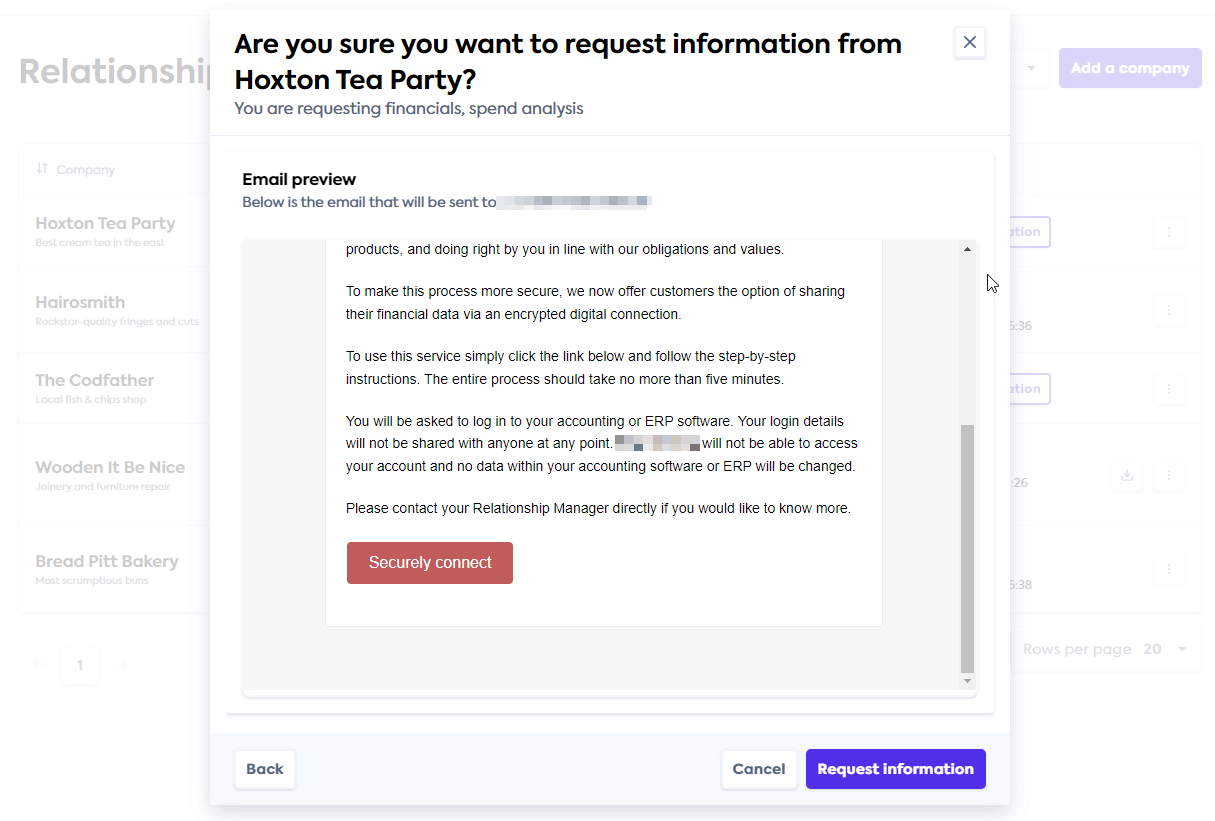
Next, click Request. This will display an email preview that will be sent to the contact email address you listed for the company. Click Request information to confirm the sending of the email.
You will see a confirmation message once the email is sent. Alternatively, you can click Cancel. This will take you back to the Relationship Portal, where you can always request the financial data at a later stage.
Request data after company creation
You can also choose to request the company's financial data at a later stage if you have not done that during company creation.
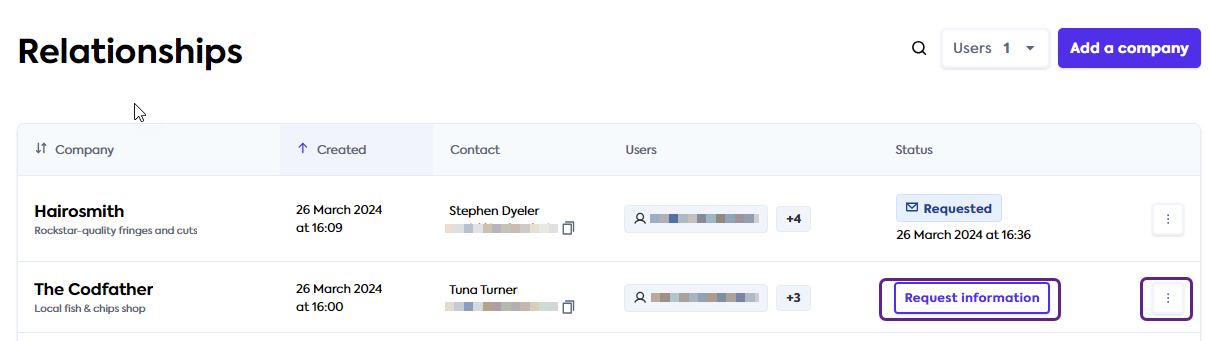
To do so, locate the client's company in the Relationship Portal and click the Request information button. Alternatively, click the triple-dot menu and select Request information there.
In the pop-up window, select the Spend analysis tickbox to ask your client for accounts payable and supplier information to the level of individual transactions, payment methods, terms, etc. You can also choose to request Financials, which include a profit and loss statement and a balance sheet statement enriched with our categorization feature.
Next, click Request. This will display an email preview that will be sent to the contact email address you listed for the company. Click Request information to confirm the sending of the email.
You will see a confirmation message once the email is sent.
Multi-entity companies
If you want to request spend analysis data from a customer who has multiple subsidiary companies, you don't need to create and request data for each subsidiary individually.
When responding to your request, the customer should follow the multi-entity connection journey. They will be asked to create the relevant subsidiaries and connect an accounting platform for each one during that journey.
As a result, you will see the main legal entity and its subsidiaries in the Relationship Portal.
Support your customer
You may want to have a call with the customer to make sure they successfully connecting their accounting platform. See our checklist for recommended best practices.
To prepare your customer for the call, let them know that:
- They will receive an information request email from
noreply@codat.iowith a link they'll need to follow. - They will need to have Administrator access or equivalent within their accounting platform.
- They will need to share their screen with you during the call.
Proactively share answers to common questions with them.
Manage existing companies
Assign an existing company
If you have previously created companies with Codat, they are available in the Relationship Portal for you to assign to the right analyst.
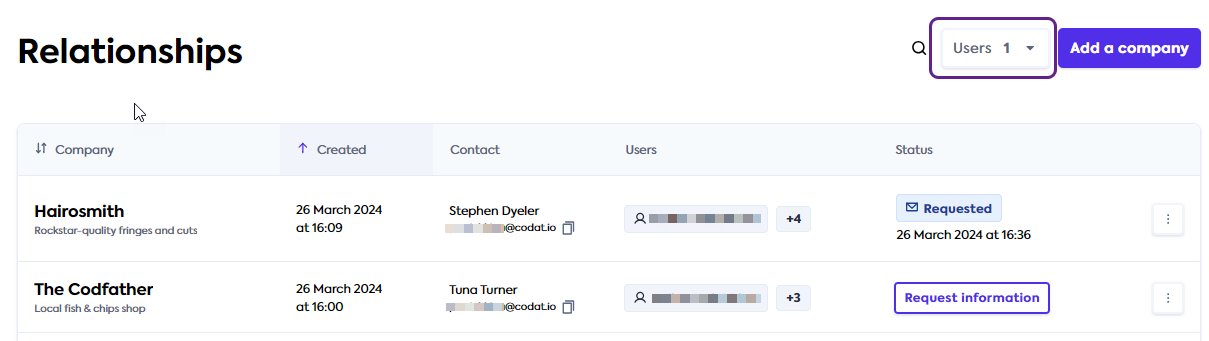
By default, the Portal displays companies that are assigned to you. To find unassigned companies or those assigned to other analysts, remove the user selection filter. Click Users, scroll through the dropdown list, and untick your name.
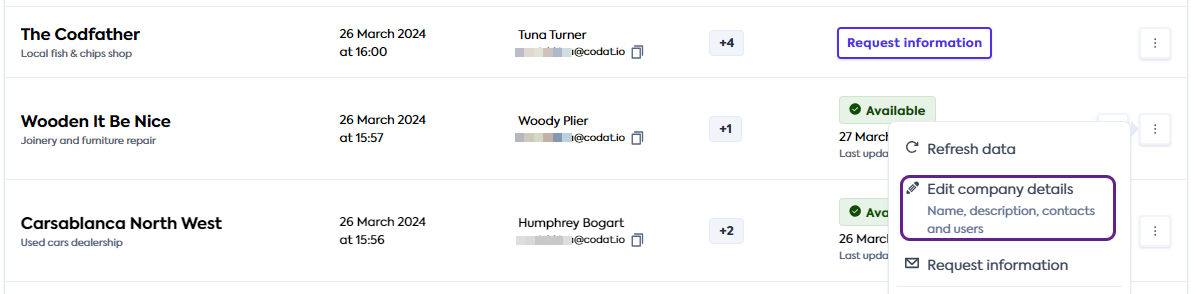
This will display an unfiltered list of companies. Then, scroll to the company you want to assign to someone, or use the search bar to find it. Next, click the triple-dot menu and select Edit company details.
In the pop-up window, scroll to the Users section and use the dropdown list to choose and assign analysts to the company. When you are ready, click Save company details.
Edit a company's details
You may want to edit details already stored for a company. To do that, find the relevant company in the list, click the triple-dot menu and select Edit company details.
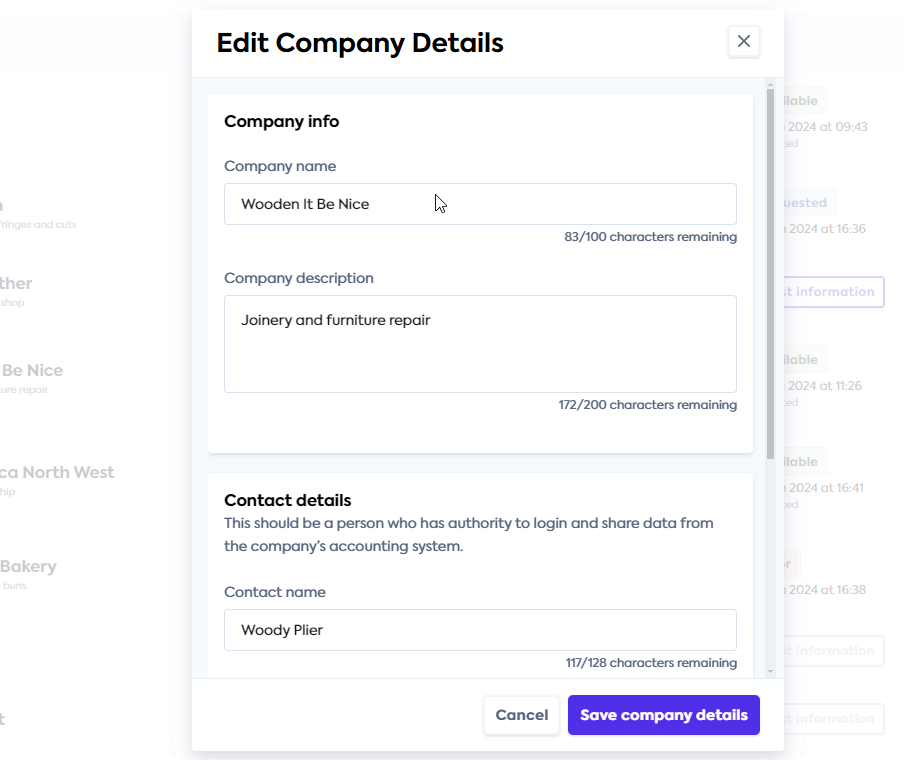
You will see a pop-up window with the following sections:
- Company info: use it to change the company name and description.
- Contact details: use it to amend the name and email of the company's point of contact.
- Users: use it to assign different analysts to be responsible for the company from a dropdown list.
Update the details as required. When you are ready, click Save company details.
Delete a company
If you no longer require a company to be available in the Relationship Portal, you can delete it. This action will delete the company record and all the data you previously received from it. As a result, you will no longer be able to access this company's reports in the Portal. This operation is not reversible.
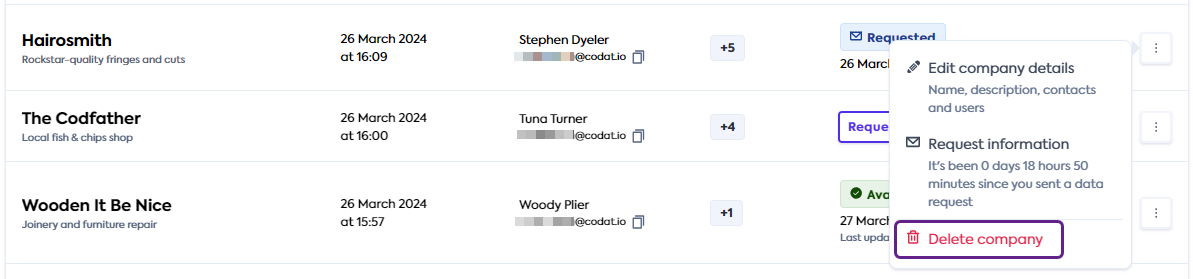
To do that, find the relevant company in the list, click the triple-dot menu and select Delete company.
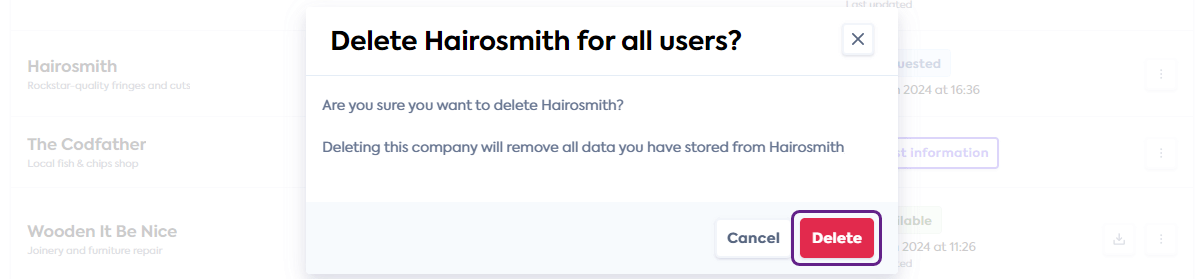
You'll need to confirm you want to delete the company. The Relationship Portal will confirm the deletion with a success message.
Read next
Next, see how to review the reports resulting from the customer information request: